
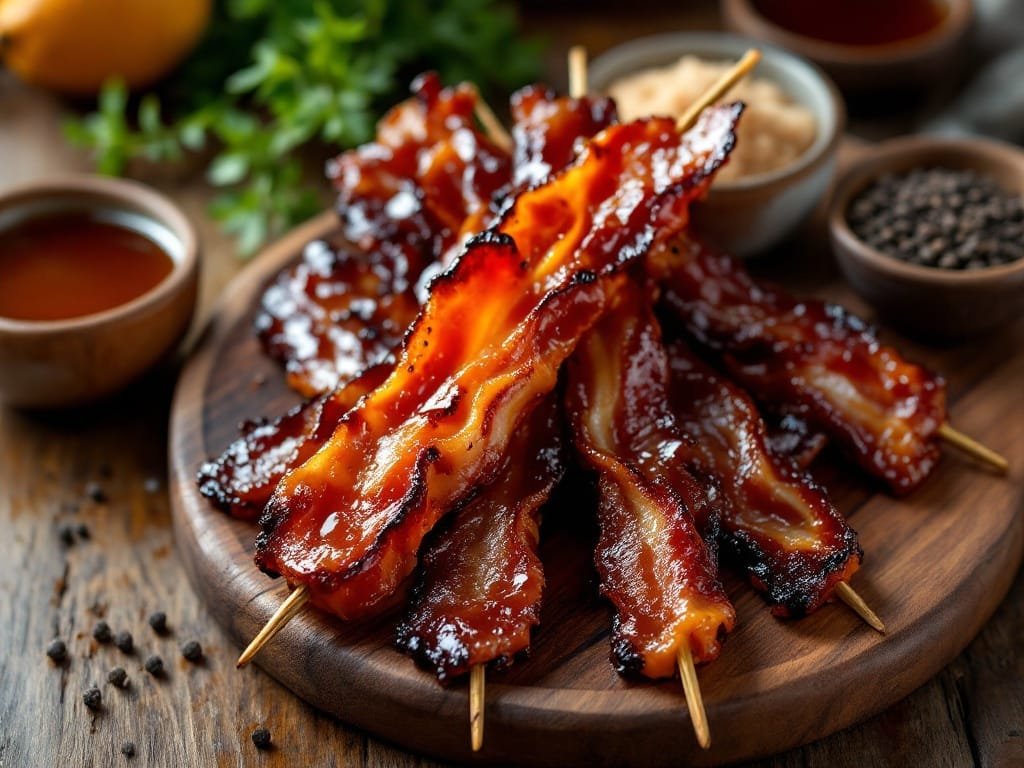
Picture this: sweet, salty, smoky, and just the right amount of crispy bacon, all wrapped up in a glossy candied coating. Sounds like a snack worth celebrating, doesn’t it? These Candied Bacon Skewers are a huge hit at gatherings and make the ultimate finger food. Trust me, you’ll want to double the batch because they disappear fast!
If sweet and savory are your love language, these skewers are calling your name!
Why You’ll Love This Recipe
- Easy to Make: Only a few ingredients and simple steps stand between you and snack heaven.
- Party-Perfect: Impress your guests with an irresistible appetizer that’s both elegant and down-to-earth.
- Customizable: You can adjust the sweetness, spice, or even add a smoky kick to suit your taste buds.
- Make-Ahead Friendly: Prep them in advance so you can enjoy stress-free entertaining.
Ingredients Breakdown
Essentials:
- Thick-Cut Bacon: The thicker the better for that satisfying chew. Regular bacon will work too, but may cook up crispier.
- Brown Sugar: This gives that signature caramelized sweetness. Light or dark brown sugar both work here.
- Maple Syrup: Adds a touch of richness and enhances the sweet-savory combo.
- Cayenne Pepper: Optional, but a little heat balances out that sweetness beautifully.
- Wooden Skewers: Soak these in water first to prevent them from burning in the oven.
Pro Tips:
- If you prefer a smokier flavor, try sprinkling a little smoked paprika alongside the brown sugar.
- No maple syrup? Honey or agave syrup work as solid substitutes here!
Step-by-Step Instructions
- Preheat your oven: Set it to 375°F (190°C) and line a baking sheet with parchment paper or aluminum foil for easy cleanup.
- Soak the skewers: Submerge your wooden skewers in water while you prepare the bacon. This prevents them from getting too charred during cooking.
- Prep the bacon: In a small bowl, mix the brown sugar and cayenne pepper. Coat each bacon slice generously in the mixture, making sure both sides are covered.
- Skewer the bacon: Thread each slice of bacon onto a soaked skewer in a zigzag pattern. Place the skewers on the prepared baking sheet.
- Brush with maple syrup: Using a pastry brush, lightly coat each bacon skewer with maple syrup. This adds an extra layer of flavor and helps the sugar caramelize.
- Bake: Pop the skewers into the oven and bake for 20-25 minutes, or until the bacon is crispy but not overly browned. Keep an eye on them so the sugar doesn’t burn!
- Cool slightly: Let the skewers rest for a few minutes before serving. The caramelized sugar will harden to give that perfect candied crunch.

Chef’s Tips and Tricks
- Don’t overcrowd: Make sure the skewers aren’t touching while baking. This allows the heat to circulate and ensures even cooking.
- For extra crispiness: Flip the skewers halfway through baking to crisp both sides evenly.
- Mess-free tip: Use a wire rack over the baking sheet to let excess grease drip away as the bacon bakes.
Recipe Variations and Serving Suggestions
- Spicy Kick: Crushed red pepper flakes or chili powder in the brown sugar mix take this up a notch.
- Sweet and Tangy: A drizzle of balsamic glaze adds a fun flavor twist.
- Pairing Ideas: Serve these skewers alongside a cheese platter or as part of a brunch spread with mimosas!
FAQs
- Can I make these ahead of time? Yes! You can prepare the skewers up to the baking step, refrigerate, and bake them right before serving.
- How do I store leftovers? Keep any extras in an airtight container in the fridge for up to 3 days. Reheat in the oven for the best texture.
- Can I freeze them? While it’s possible to freeze cooked candied bacon, the texture may not be as crisp once thawed and reheated.