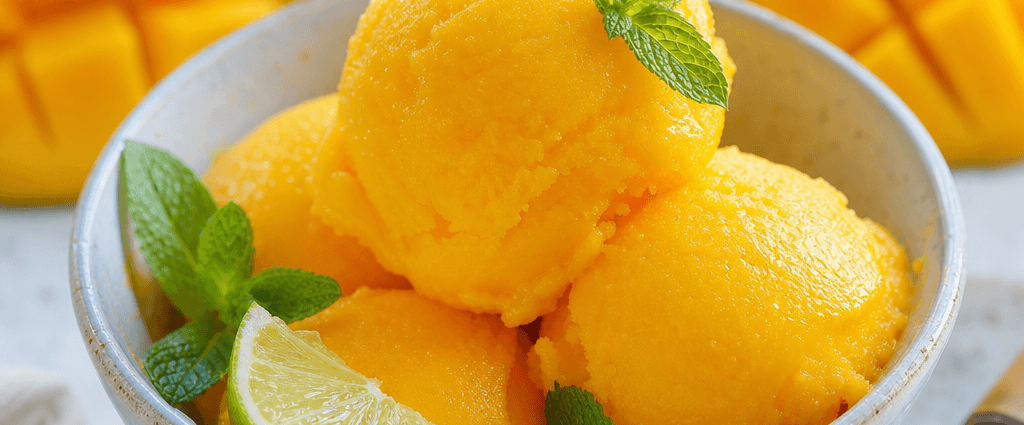
Close your eyes and imagine sunshine in a bowl, because that is exactly what this homemade mango sorbet tastes like. It is bright, refreshing, naturally dairy-free, and so ridiculously easy to make that it barely counts as a recipe: four simple ingredients, one blender, and about ten minutes of your time. No ice cream machine, no custard base, no churning. Just pure, golden, tropical joy that you can be eating almost immediately.
Whether you are cooling down after a backyard barbecue, capping off taco night, or treating yourself on a completely ordinary Tuesday because why not, this sorbet delivers every time. Frozen mango does all the heavy lifting, lime juice sharpens the tropical sweetness, and a touch of honey or maple syrup rounds everything out into a scoopable, spoonable dream. It has become one of my most-requested summer desserts, and once you see how simple it is, I suspect it will become one of yours too.
Why You’ll Love This Recipe
The best part of this recipe is what it does not require. There is no ice cream machine, no cooking, no waiting overnight, and no special skills; a blender or food processor is the only equipment standing between you and dessert. Blend everything for two or three minutes and you have an instant soft-serve texture, or freeze it briefly for classic scoopable sorbet. Either way, the active work is done before your coffee gets cold.
It is also a dessert nearly everyone at the table can enjoy. Mango sorbet is naturally dairy-free and gluten-free, easily made vegan by choosing maple syrup over honey, and sweetened primarily by the fruit itself. Kids adore it, guests with dietary restrictions can actually eat it, and you get to feel pretty good about serving something that is mostly just fruit. It keeps beautifully in the freezer too, so you can stash a container away for spontaneous sorbet emergencies, which in my house are surprisingly frequent.
Ingredients
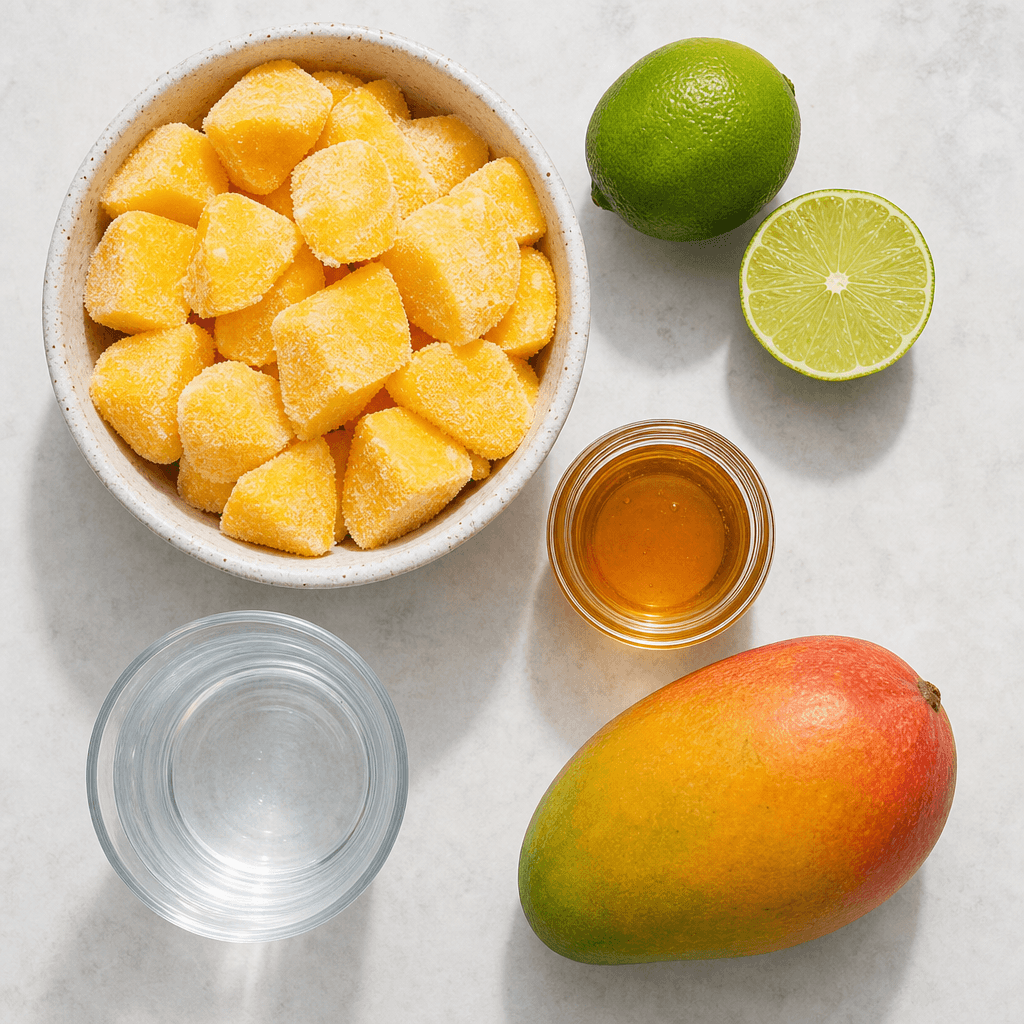
The star is four cups of frozen mango chunks, and their quality determines everything, so choose ripe, sweet mango. Store-bought frozen mango works wonderfully here, and it is often frozen at peak ripeness; just check the label to make sure there are no added sugars. If you prefer to start with fresh mangoes, simply peel, cube, and freeze the chunks in a single layer until solid before blending.
Supporting the mango are a quarter cup of fresh lime juice, which is about two limes’ worth and provides the essential bright, tangy counterpoint to all that tropical sweetness, plus a third of a cup of honey or maple syrup, adjusted to taste. If your mangoes are exceptionally ripe and sweet, feel free to cut the sweetener back or skip it entirely. Finally, half a cup of cold water brings the blend together; swap it for mango juice if you want an even deeper mango flavor. A tiny pinch of salt is optional but genuinely magical for amplifying the fruit, and one or two tablespoons of coconut cream can be added for a creamier, almost gelato-like finish.
Step-by-Step Instructions
Start by loading your blender or food processor with the frozen mango chunks, lime juice, honey or maple syrup, and cold water. A high-powered blender handles this most easily, but a standard blender or food processor absolutely works; you may just need a little more patience and scraping. If your machine is struggling with the rock-hard fruit, let the mango sit at room temperature for five to ten minutes to soften slightly before you begin.
Blend until the mixture is completely smooth and creamy, which usually takes about two to three minutes. Stop once or twice to scrape down the sides and push the mango toward the blades, and resist the urge to add extra water; a thick, slow-moving blend is exactly what gives sorbet its luscious, dense texture. You will know it is ready when the mixture turns pale gold, glossy, and swirls like soft-serve around the blades.
Now comes the best part of the job: tasting. Give the sorbet a try and adjust it to your liking, adding a bit more honey or maple syrup if your mango was on the tart side, or another squeeze of lime if you want extra brightness. This is your dessert, and the two minutes you spend fine-tuning here make the difference between good and perfect.
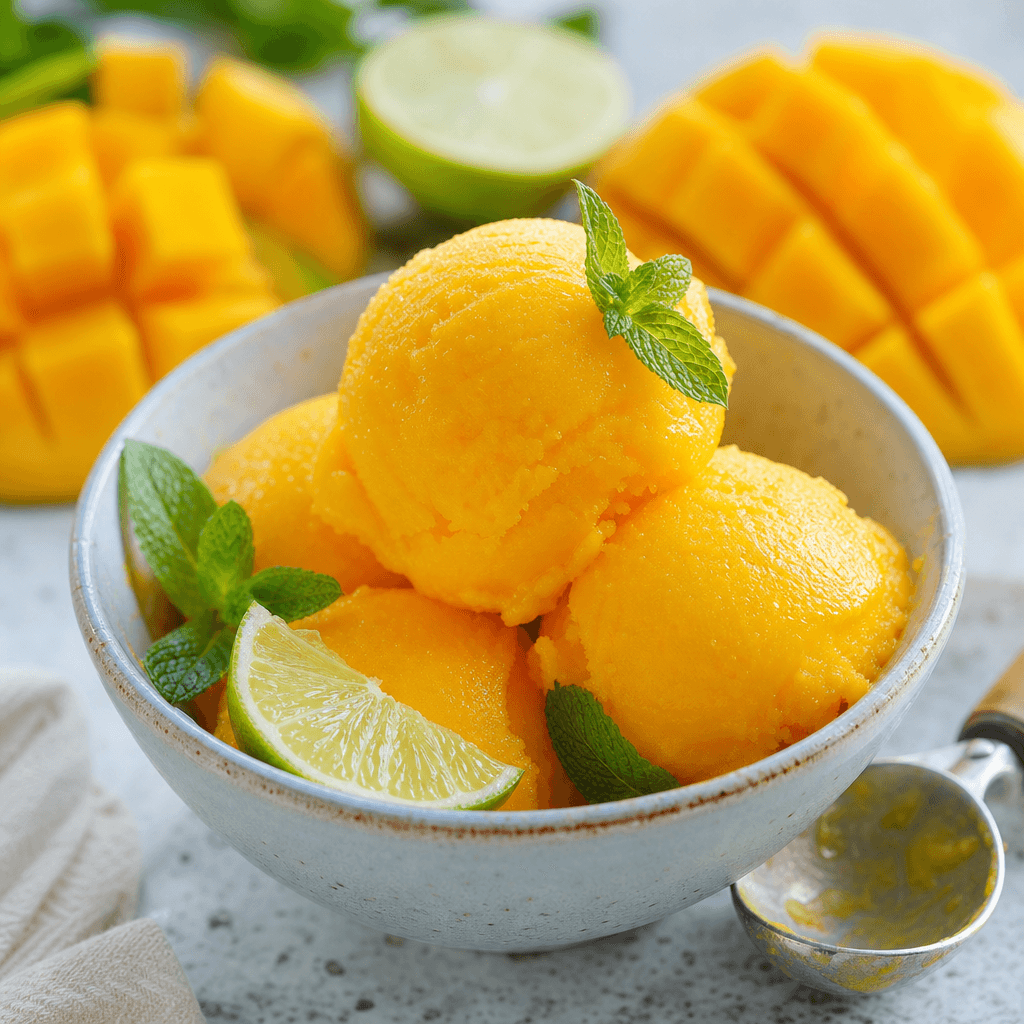
At this point you have a decision to make, and both options are delicious. Serve the sorbet immediately for a soft, spoonable, soft-serve-style treat, or transfer it to a freezer-safe container, smooth the top, and freeze for two to three hours for a firmer, scoopable classic sorbet. If it freezes solid overnight, no problem at all; just let the container sit at room temperature for five to ten minutes before scooping, and it will yield gorgeous, glistening scoops.
Tips for the Best Mango Sorbet
Everything in this recipe rides on the mango, so make it count. Ripe, fragrant, deeply orange mango gives you a sorbet that needs almost no help, while pale, under-ripe fruit will taste flat no matter how much sweetener you add. That secret pinch of salt really does intensify the mango flavor, so trust the process. And for effortless future batches, freeze leftover sorbet flat in a zip-top bag; it thaws quickly and can even be re-blended in seconds for instant fresh texture.
This sorbet also loves to dress up. Swirl raspberry puree through it before freezing for a stunning ripple, top scoops with toasted coconut flakes and fresh mint for a dinner-party finish, or add a whisper of grated ginger or chili powder for an exotic kick. For a full tropical menu, serve it after these grilled shrimp tacos with mango salsa, or offer it alongside a warm fruit dessert like my blackberry cobbler so guests can choose between cozy and cooling. An adults-only splash of tequila or rum in the blender turns it into a frozen cocktail-adjacent treat, too.
One final texture tip: homemade sorbet contains no stabilizers, so it is at its silky best within the first few days. It stays perfectly tasty in an airtight container for up to two weeks, but plan to enjoy the bulk of it early, when the texture is smoothest. Letting a rock-solid container rest on the counter before scooping is always better than microwaving, which melts the edges unevenly.
Kitchen Gear for This Recipe
- Instant-Read Meat Thermometer
- Enameled Cast Iron Dutch Oven
- Heavy-Duty Sheet Pan Set
- Glass Mixing Bowl Set
As an Amazon Associate, The Kitchen’s Aid earns from qualifying purchases at no extra cost to you.
Frequently Asked Questions
Can I make mango sorbet without a blender?
You will need some kind of high-speed appliance, either a blender or a food processor, to achieve that smooth, creamy texture. Even a mini blender works if you process the mixture in batches.
How long does homemade sorbet last in the freezer?
Stored in an airtight container, it stays fresh for up to 2 weeks, though the texture is at its silky best within the first few days.
Can I use fresh mango instead of frozen?
Yes! Cut fresh mango into chunks and freeze them in a single layer until solid before blending, or add some ice to the blender if you want to use fresh fruit right away.
Is this mango sorbet vegan?
It easily can be. Simply use maple syrup or agave nectar instead of honey, and the entire recipe is vegan, dairy-free, and gluten-free.
Why is my sorbet icy instead of creamy?
Icy sorbet usually means too much added water or under-blending. Keep the blend thick, process until completely smooth, and consider adding a tablespoon or two of coconut cream for extra creaminess.
I hope this mango sorbet brings a scoop of sunshine to your table all season long. If you love light, feel-good treats like this one, there are plenty more healthy eating ideas waiting on our sister site. And if you whip up a batch, snap a photo of those golden scoops and tag @thekitchensaid on Instagram, because I love seeing your creations. Let’s celebrate the sweet little things, one scoop at a time!
Homemade Mango Sorbet
American · Dessert
Bright, refreshing homemade mango sorbet made with just 4 ingredients in a blender — no ice cream machine needed. Naturally dairy-free and easily vegan.
Ingredients
- 4 cups frozen mango chunks (ripe and sweet)
- 1/4 cup fresh lime juice (about 2 limes)
- 1/3 cup honey or maple syrup, adjusted to taste
- 1/2 cup cold water (or mango juice)
Instructions
- Add the frozen mango chunks, lime juice, honey or maple syrup, and cold water to a high-powered blender or food processor.
- Blend until smooth and creamy, about 2-3 minutes, scraping down the sides as needed.
- Taste and adjust the sweetness or lime juice to your liking.
- Serve immediately for a soft-serve texture, or transfer to a freezer-safe container and freeze 2-3 hours for a firmer scoop.
- If frozen solid, let sit at room temperature 5-10 minutes before scooping and serving.
Nutrition: 165 calories