Hey there! If you’ve ever had a steaming bowl of miso soup at your favorite Japanese restaurant and thought, “I could sip on this every day,” you’re in for a treat. This homemade version is simple, nourishing, and comes together in minutes. It’s like a warm hug in a bowl—and you don’t need a culinary degree to make it!
If you’re looking for a dish that feels like pure comfort but keeps things light and healthy, this miso soup will hit the spot!
Why You’ll Love This Recipe
- 🌿 Healthy & Nourishing: Packed with umami-rich miso and tofu for a protein boost.
- ⏱️ Quick & Easy: Ready in just 15 minutes from start to finish.
- 🐟 Customizable: Make it vegan, add seafood, or mix in other veggies—it’s your canvas!
Ingredients Breakdown
Essentials
- Miso Paste: The star ingredient! Use white or yellow miso for a mild, slightly sweet soup. Red miso can be used for a deeper, richer flavor.
- Dashi Stock: Traditional Japanese soup stock made from kombu (seaweed) and bonito flakes. Can’t find it? Use a veggie broth or dashi powder for convenience.
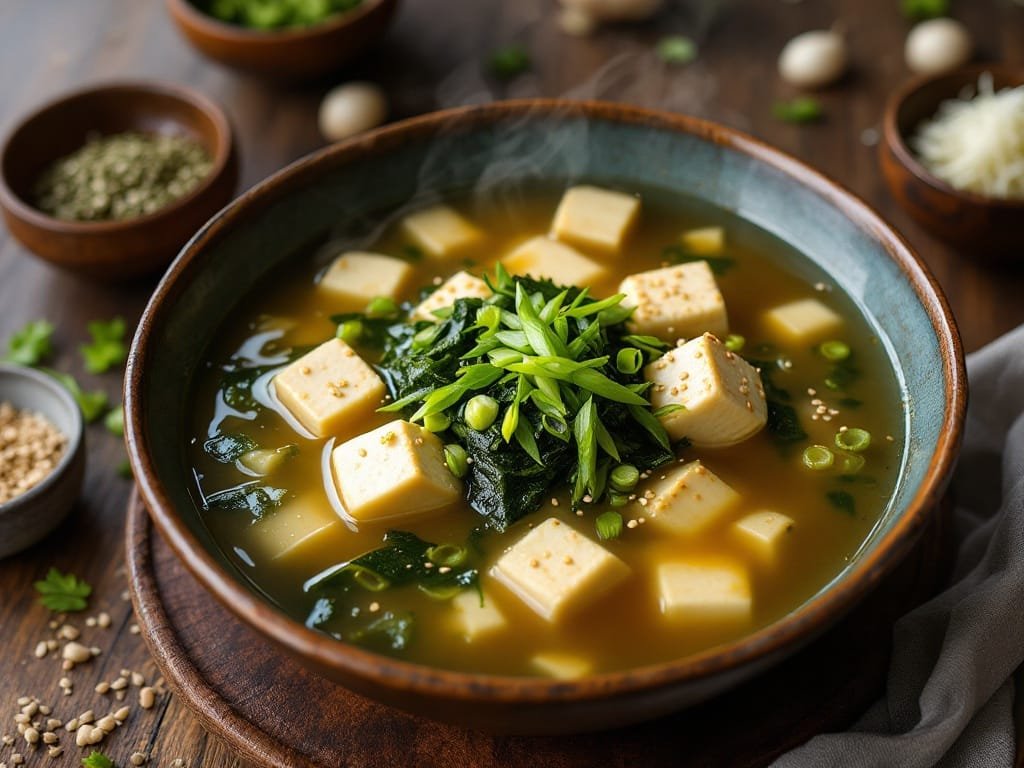
- Soft Tofu: Adds creaminess to the soup. Cut into small cubes for the best texture in each spoonful.
- Seaweed (Wakame): Brings in a little oceanic flavor. You’ll only need a small amount since it expands in water!
- Scallions: Freshly chopped for that vibrant, oniony zing.
Pro Tips
- Substitution Tip: No dashi? A blend of veggie broth and a splash of soy sauce can work in a pinch.
- Miso Matters: Avoid boiling the miso paste; it can kill its beneficial probiotics. Always stir it in after the soup’s off the heat.
Step-by-Step Instructions
- Start by rehydrating the wakame. Place about 2 teaspoons of dried wakame seaweed in a small bowl of water and let it soak for 5 minutes. It’ll puff up like magic!
- In a medium pot, bring 4 cups of dashi stock to a gentle simmer.
- Add the soaked wakame and 1 cup of cubed tofu to the pot. Let it gently heat for 1-2 minutes.
- In a ladle or small bowl, mix 2-3 tablespoons of miso paste with a bit of hot broth to dissolve it completely. Then, stir this mixture back into the pot.
- Turn off the heat and top with freshly chopped scallions. Voilà! Your miso soup is ready to serve.
Chef’s Tips and Tricks
- Avoid Overheating: Once you add the miso paste, turn off the heat. Overheating can dull the miso’s flavor and health benefits.
- Extra Umami: A small splash of soy sauce or a sprinkle of toasted sesame seeds can elevate the flavor even more.
- Garnish Galore: Add thinly sliced mushrooms or a sprinkle of chili flakes for more variety.
Recipe Variations and Serving Suggestions
- Make It Vegan: Use kombu (seaweed) dashi and skip the bonito flakes.
- Add Protein: Shrimp, clams, or even cooked shredded chicken pair beautifully with the subtle miso broth.
- Serving Idea: Pair your miso soup with a simple cucumber salad and a side of rice for a complete Japanese-inspired meal.
FAQs
Can I store miso soup?
Yes, but it’s best enjoyed fresh. If you have leftovers, store the broth, tofu, and seaweed separately and combine when reheating. The miso paste can lose its punch over time, so add fresh miso to leftovers for a flavor boost.
Can I freeze miso soup?
Freezing is not recommended, as the tofu and seaweed can change texture. Stick to refrigerating for up to 3 days.
Can I use other vegetables?
Absolutely! Thinly sliced mushrooms, spinach, or bok choy would be wonderful additions to this soup.
Printable Recipe Card
Miso Soup
- Prep Time: 5 minutes
- Cook Time: 10 minutes
- Servings: 2-4
Ingredients:
- 2 teaspoons dried wakame seaweed
- 4 cups dashi stock
- 1 cup soft tofu, cubed
- 2-3 tablespoons miso paste (white or yellow)
- 2 scallions, chopped
Instructions:
- Rehydrate wakame seaweed by soaking in water for 5 minutes.
- Bring dashi stock to a simmer in a pot.
- Add wakame and tofu to the pot. Simmer for 1-2 minutes.
- Dissolve miso paste in a ladle of hot broth, then mix back into the soup.
- Turn off the heat, garnish with scallions, and serve.
I can’t wait for you to try this miso soup and make it your own! Whether you’re sipping it as a light lunch or serving it as a starter, it’s sure to bring a little joy to your table. Share your creations with me by tagging #TheKitchensAid—I love seeing your delicious spins on my recipes!
Cozy Miso Soup Recipe for a Nourishing Meal
Japanese · Soup
Simple, nourishing miso soup ready in minutes—comforting, customizable, and light.
Ingredients
- 2 teaspoons dried wakame seaweed
- 4 cups dashi stock
- 1 cup soft tofu, cubed
- 2-3 tablespoons miso paste (white or yellow)
- 2 scallions, chopped
Instructions
- Start by rehydrating the wakame. Place about 2 teaspoons of dried wakame seaweed in a small bowl of water and let it soak for 5 minutes. It’ll puff up like magic!
- In a medium pot, bring 4 cups of dashi stock to a gentle simmer. Add the soaked wakame and 1 cup of cubed tofu to the pot. Let it gently heat for 1-2 minutes.
- In a ladle or small bowl, mix 2-3 tablespoons of miso paste with a bit of hot broth to dissolve it completely. Then, stir this mixture back into the pot.
- Turn off the heat and top with freshly chopped scallions. Voilà! Your miso soup is ready to serve.