Introduction
Ah, Coconut Cream Pie—that quintessential dessert that hits just the right balance of tropical flavor and creamy sweetness. This recipe is one near and dear to my heart, bringing back memories of weekend family gatherings where this pie was always the first to disappear. It’s luscious, it’s a little indulgent, and it’s got that perfect flaky homemade crust that makes a world of difference. If you’ve got a soft spot for coconut, consider this pie your next must-bake.
Hook: Craving something light yet indulgent? This Coconut Cream Pie is like a dreamy trip to the tropics—no passport required!
Why You’ll Love This Recipe
- It’s made with real coconut milk & toasted coconut flakes—next-level flavor!
- A flaky, homemade pie crust to complement that creamy filling.
- Perfect for holidays, family gatherings, or when you just want something special.
- No finicky techniques—if you can stir, you can make this pie!
Ingredients Breakdown
Essentials
- Pie Crust: Whether you prefer homemade or store-bought, a good crust is key. I’ll link to my easy pie crust recipe below!
- Unsweetened Coconut Milk: Provides that creamy coconut base. You can find it in the canned goods section, usually near the Asian foods.
- Coconut Flakes: Toasted coconut takes the flavor up a notch and adds a bit of texture on top!
- Egg Yolks: Helps thicken the filling into true custard-like goodness.
- Heavy Cream: To make that pillowy, fresh whipped cream topping (store-bought is okay in a pinch, but homemade elevates this pie considerably).
Pro Tips
- You can substitute sweetened coconut flakes if that’s what you have, just reduce the sugar slightly to keep everything balanced.
- If making a dairy-free pie, swap out heavy cream with chilled coconut cream for a whipped topping!
- For extra depth of flavor, add 1/4 teaspoon of almond extract to the filling—coconut and almond together are magic.
Step-by-Step Instructions
Ready? Let’s walk through it together, step by step.
Step 1: Toasting the Coconut Flakes
First, place 1/2 cup of your coconut flakes on a baking sheet and bake them at 350°F (175°C) for about 5-7 minutes, until they’re lightly golden and toasty. Keep an eye on these—they go from perfect to burnt fast! Set aside to cool.
Step 2: Making the Pie Crust
If you’re using store-bought pie crust, skip this step. But if you’re going homemade (yay!), use your favorite recipe or try my foolproof pie crust recipe. After preparing the dough, roll it out and fit it into your pie dish. Bake the pie shell empty (called blind baking) at 375°F for 15-20 minutes. Once golden brown, let it cool completely.
Step 3: Whipping Up the Coconut Filling
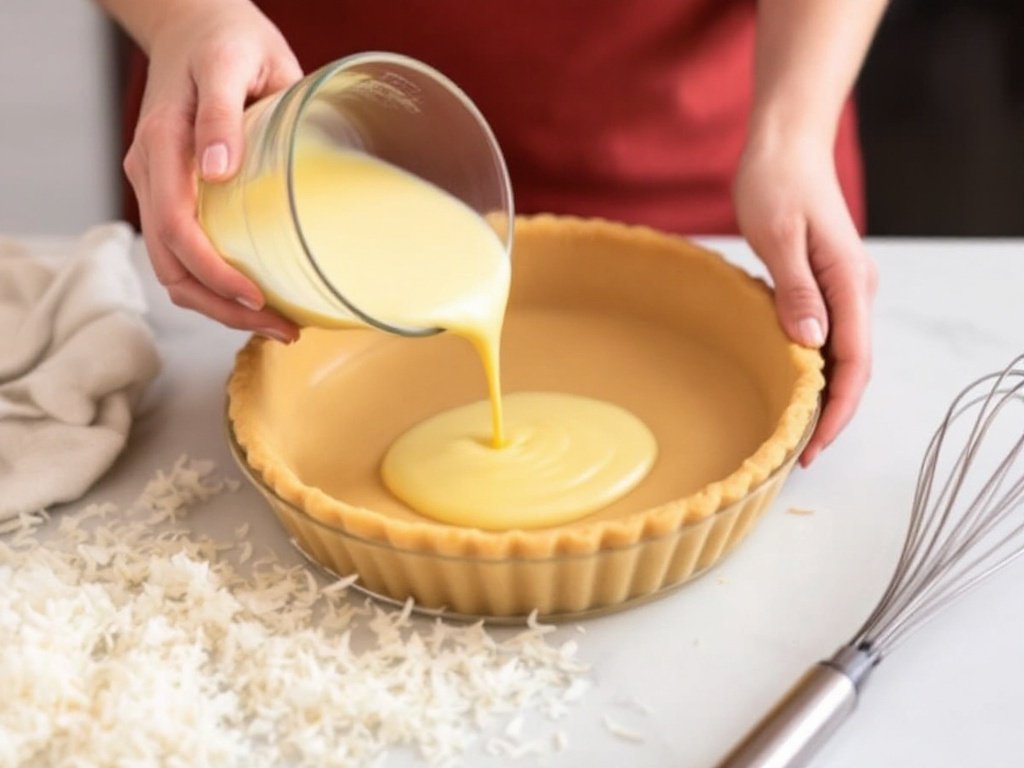
In a medium saucepan, whisk together 1 can of coconut milk, 1/2 cup of sugar, and a pinch of salt. Heat over medium heat until it’s just about to simmer. Meanwhile, in a separate bowl, whisk together 4 egg yolks and 2 tablespoons of cornstarch until smooth. Slowly pour about 1/2 cup of the heated coconut milk mixture into the eggs, whisking continuously (this tempers the eggs so you don’t scramble them).
Now, pour the egg mixture back into the saucepan and continue cooking over medium heat, whisking constantly, until the mixture thickens—about 5-7 minutes. Once it’s luxuriously thick, remove from heat and stir in 1/2 teaspoon of vanilla extract and 1 tablespoon of butter. Let the mixture cool slightly before pouring it into your prepared pie shell.
Step 4: The Whipped Cream Topping
While the pie chills in the fridge (at least two hours, or until set), whip up your topping! In a cold mixing bowl, beat 1 cup of heavy cream with 2 tablespoons of powdered sugar until stiff peaks form. Spread or pipe the cream onto the cooled pie.

Step 5: Assembling & Serving
Once your pie is topped with a cloud of whipped cream, sprinkle the toasted coconut flakes on top for that crunchy little bonus. Now, slice and enjoy!
Chef’s Tips and Tricks
- Make-Ahead Tip: You can bake the pie shell and make the coconut filling a day in advance. Just store them separately and assemble with whipped cream right before serving for ultimate freshness.
- Keep It Cool: To get nice, clean slices, chill your pie well and use a hot knife (run under hot water, then wipe dry) when slicing.
- Extra Toasted Coconut: Toast extra flakes and store them in a jar for sprinkling on yogurt, adding to granola, or just snacking!
Recipe Variations and Serving Suggestions
- Chocolate Coconut Cream Pie: Want to make it choco-coconut heaven? Add a layer of melted chocolate to the bottom of the pie crust before pouring in the coconut filling.
- Low-Sugar Version: Replace half of the sugar with a natural sweetener like stevia or monk fruit sweetener for a lighter dessert.
- Dairy-Free Option: Swap out the heavy cream in the filling and topping for full-fat coconut cream. It makes the pie extra coconutty (in the best way).
FAQs
Can I freeze Coconut Cream Pie?
Yes, you can freeze coconut cream pie without the whipped cream. Just cover it tightly with plastic wrap and store for up to 2 months. When you’re ready to serve, thaw it overnight in the fridge and add fresh whipped cream on top.
How long will it keep in the fridge?
Stored in an airtight container, this pie will keep for about 3-4 days in the fridge. After that, the crust might start to get soggy, but trust me—it never lasts that long in my house!
Recipe Card
| Coconut Cream Pie Recipe | |
|---|---|
| Prep Time: | 30 mins |
| Cook Time: | 20 mins |
| Chill Time: | 2 hours |
| Servings: | 8 slices |
| Ingredients: | |
| |
Conclusion
This Coconut Cream Pie is the perfect indulgence to share—or keep all to yourself! Every bite is filled with creamy, coconutty goodness that will make your taste buds dance. I can’t wait for you to try it! Don’t forget to tag me on Instagram if you make it or comment below with your variations or questions. Happy baking!


