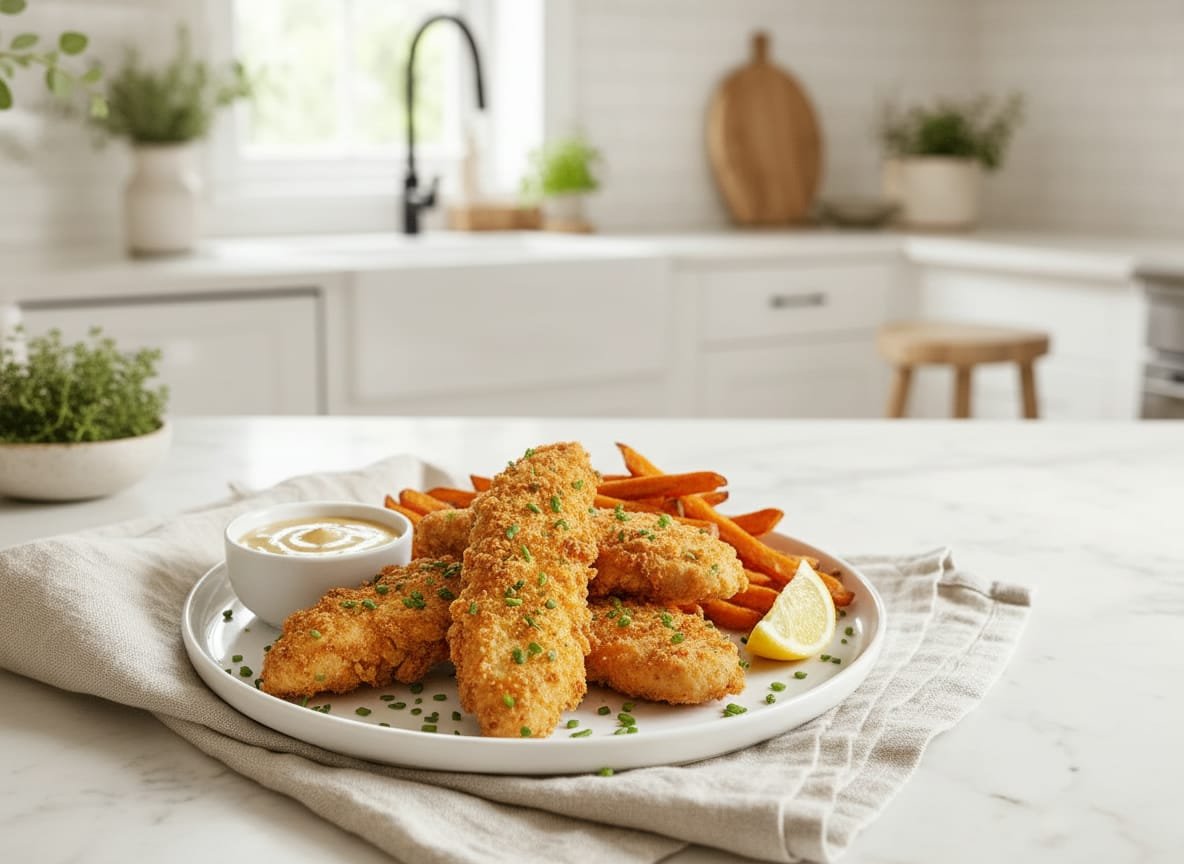
Crispy Air Fryer Chicken Tenders Recipe – Easy & Healthy!
Hello, my wonderful kitchen friends! Today I’m sharing one of my absolute favorite weeknight dinners that has completely changed the game in my household – Air Fryer Chicken Tenders! These golden, crispy beauties are so incredibly delicious that you won’t believe they’re made with barely any oil. Trust me when I say these rival any restaurant version, and they’re ready in just 20 minutes from start to finish.
I discovered this recipe when I was trying to recreate that perfect crunch we all love about fried chicken, but without the guilt or mess of deep frying. After testing countless variations, I finally nailed it! The secret is in the double coating technique and the perfect blend of seasonings that creates an incredibly flavorful, crunchy exterior while keeping the chicken tender and juicy inside.
Why You’ll Love This Recipe
Let me tell you why these air fryer chicken tenders have become a staple in my kitchen, and why I know they’ll become one in yours too! First and foremost, they’re so much healthier than traditional fried chicken tenders. We’re talking about using just a light spray of oil instead of cups of frying oil – that’s a massive difference in calories and fat content, but absolutely zero difference in that satisfying crunch we crave.
The convenience factor is unbeatable. There’s no heating up a huge pot of oil, no splattering grease all over your stovetop, and cleanup is an absolute breeze. I can have these on the table faster than I could drive to a fast-food restaurant and back. Plus, my air fryer does most of the work while I prepare a quick side salad or some roasted vegetables.
These chicken tenders are incredibly kid-friendly – my little ones request them at least once a week! They’re also perfect for meal prep. (They slot right into our favorite meal prep strategies.) I often make a double batch on Sunday and use them throughout the week for quick lunches, salad toppers, or easy dinners. They reheat beautifully in the air fryer, staying just as crispy as when they were first made.
The versatility is another huge win. Serve them with your favorite dipping sauces – honey mustard, barbecue, ranch, or buffalo sauce – slice them over a Caesar salad, tuck them into wraps, or make chicken tender sliders. The possibilities are truly endless!
Ingredients
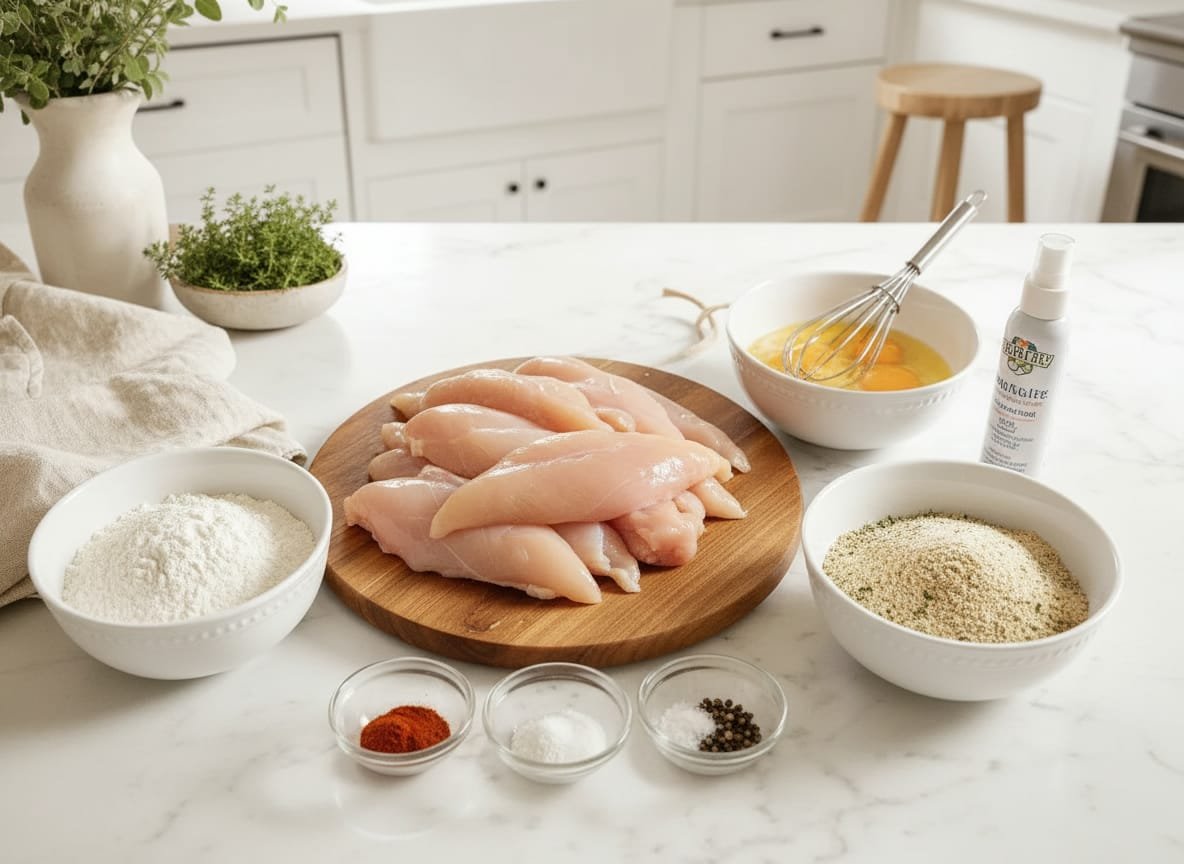
The beauty of this recipe lies in its simplicity. You probably have most of these ingredients in your pantry already! I love using everyday staples to create something extraordinary. Here’s what you’ll need:
For the Chicken: I use boneless, skinless chicken breasts cut into strips, but you can absolutely buy pre-cut tenderloins if you prefer. The key is making sure they’re relatively uniform in size so they cook evenly.
For the Breading Station: We’ll set up a classic three-step breading process. All-purpose flour goes in the first bowl – this helps the egg mixture stick. Eggs get whisked up for the second bowl – they act as the glue for our coating. And finally, the star of the show: a mixture of panko breadcrumbs and regular breadcrumbs. The combination gives us both crunch and adherence.
For the Seasoning: This is where the magic happens! Garlic powder, onion powder, smoked paprika, salt, black pepper, and a touch of cayenne pepper for just a hint of heat. These seasonings go into both the flour and the breadcrumb mixture, ensuring every bite is packed with flavor.
Step-by-Step Instructions
Don’t worry – this process is much simpler than it might seem! I’ll walk you through each step, and before you know it, you’ll be enjoying restaurant-quality chicken tenders from the comfort of your own kitchen.
Step 1: Prep Your Chicken
Start by cutting your chicken breasts into strips about 1-inch wide. I like to cut them slightly on the diagonal – it makes them look more professional! Pat them completely dry with paper towels. This is crucial because any excess moisture will prevent the coating from sticking properly. Season the chicken strips lightly with salt and pepper.
Step 2: Set Up Your Breading Station
Grab three shallow bowls or dishes and line them up assembly-line style. In the first bowl, combine the flour with half of your seasonings – garlic powder, onion powder, paprika, salt, and pepper. In the second bowl, whisk together the eggs with a tablespoon of water until well combined. In the third bowl, mix together the panko breadcrumbs, regular breadcrumbs, and the remaining seasonings. I like to add a tiny bit of oil to the breadcrumb mixture and mix it with my hands – this helps create extra crispy spots!
Step 3: Bread the Chicken
Now for the fun part! Take each chicken strip and coat it first in the seasoned flour, shaking off any excess. Then dip it into the egg mixture, letting any excess drip off. Finally, press it into the breadcrumb mixture, making sure to coat all sides thoroughly. I really press the breadcrumbs on – don’t be shy! Place the breaded tenders on a plate. For extra crispy tenders, you can let them rest for about 10 minutes before air frying, but this step is optional.
Step 4: Preheat Your Air Fryer
Preheat your air fryer to 400°F (200°C) for about 3-5 minutes. This ensures the chicken starts cooking immediately when it hits the basket, which helps create that crispy exterior we’re after.
Step 5: Air Fry the Chicken Tenders
Lightly spray the air fryer basket with cooking spray or brush it with a tiny bit of oil. Arrange the chicken tenders in a single layer in the basket, making sure they’re not touching or overlapping. Depending on the size of your air fryer, you may need to work in batches. Give the tops of the tenders a light spray with cooking spray – this helps them get extra golden and crispy.
Air fry for 10-12 minutes, flipping halfway through. At the 5-6 minute mark, carefully flip each tender and give the other side a light spray. The chicken is done when it reaches an internal temperature of 165°F and the coating is golden brown and crispy. If they need a bit more color, you can add an extra minute or two.
Step 6: Rest and Serve
Transfer the cooked tenders to a wire rack or plate and let them rest for 2-3 minutes. This allows the juices to redistribute and ensures every bite is juicy and tender. Serve immediately with your favorite dipping sauces!
Tips for Perfect Chicken Tenders Every Time
After making these chicken tenders countless times, I’ve picked up some tricks that guarantee success every single time. Let me share my insider tips with you!
Don’t Overcrowd the Basket: I cannot stress this enough! Air fryers work by circulating hot air around the food. If the tenders are touching or overlapping, they’ll steam instead of crisp up. Leave space between each piece, even if it means cooking in batches. The wait is worth it, I promise!
Use a Meat Thermometer: This is my secret weapon for perfectly cooked chicken every time. An instant-read thermometer takes the guesswork out of cooking. Insert it into the thickest part of the tender – you’re looking for 165°F. Once you hit that temperature, you know the chicken is safe to eat and won’t be overcooked.
The Oil Spray Makes a Difference: While these chicken tenders use minimal oil compared to deep frying, that light spray is important! It helps the breadcrumbs crisp up and turn that beautiful golden color. I use an oil mister filled with avocado or olive oil – it gives me more control than aerosol sprays.
Experiment with Seasonings: Once you’ve mastered the basic recipe, feel free to get creative! I love adding Italian herbs and parmesan for an Italian twist, or using Cajun seasoning for a spicy kick. You could even add some dried ranch seasoning mix to the breadcrumbs for ranch-flavored tenders!
For Extra Crispy Results: Try adding a tablespoon of cornstarch to your flour mixture. It creates an even crunchier coating! Also, letting the breaded chicken rest for 10-15 minutes before cooking allows the coating to adhere better.
Reheating Leftovers: If you have any leftovers (though in my house, that’s rare!), reheat them in the air fryer at 350°F for 3-4 minutes. They’ll crisp right back up! Don’t use the microwave – it makes them soggy.
Kitchen Gear for This Recipe
- Instant Pot Duo 6-Quart
- Tempered Glass Instant Pot Lid
- Steamer Basket & Trivet Set
- Instant-Read Meat Thermometer
As an Amazon Associate, The Kitchen’s Aid earns from qualifying purchases at no extra cost to you.
Frequently Asked Questions
Can I use chicken thighs instead of breasts?
Absolutely! Boneless, skinless chicken thighs work wonderfully in this recipe. They’re actually more forgiving and stay even juicier than breast meat. Just cut them into similar-sized strips and follow the same cooking instructions. You might need to add an extra minute or two to the cooking time.
Can I make these gluten-free?
Yes, you definitely can! Simply substitute the all-purpose flour with your favorite gluten-free flour blend or rice flour, and use gluten-free breadcrumbs or crushed gluten-free cornflakes for the coating. The texture will be slightly different but still delicious!
How do I store and reheat leftovers?
Store any leftover chicken tenders in an airtight container in the refrigerator for up to 3-4 days. To reheat, place them back in the air fryer at 350°F for 3-4 minutes until heated through and crispy again. This is so much better than using a microwave, which will make them soggy.
Can I freeze these chicken tenders?
Yes! You can freeze them either before or after cooking. To freeze before cooking, bread the chicken tenders and place them on a baking sheet in the freezer until solid, then transfer to a freezer bag. Cook from frozen, adding 3-4 extra minutes to the cooking time. To freeze after cooking, let them cool completely, then freeze in an airtight container for up to 3 months. Reheat from frozen in the air fryer at 350°F for 8-10 minutes.
My coating isn’t sticking – what am I doing wrong?
The most common culprit is not drying the chicken thoroughly enough before breading. Pat those chicken strips completely dry! Also, make sure you’re pressing the breadcrumbs firmly onto the chicken. Another tip: let the breaded chicken rest for 10 minutes before air frying – this helps the coating adhere better.
What dipping sauces do you recommend?
Oh, this is one of my favorite questions! Classic honey mustard is always a winner – just mix equal parts honey and Dijon mustard. I also love barbecue sauce, ranch dressing, buffalo sauce, or even a simple ketchup-mayo combo. For something different, try a sweet chili sauce or garlic aioli!
Do I really need both regular and panko breadcrumbs?
While you could use just one type, I find that the combination gives the best results. Regular breadcrumbs help the coating stick better, while panko provides that extra-crispy, crunchy texture. If you only have one type on hand, it will still work – just maybe not quite as perfectly crispy.
These Air Fryer Chicken Tenders have honestly become one of my most-requested recipes, and I hope they become a favorite in your home too! There’s something so satisfying about creating restaurant-quality food right in your own kitchen, and doing it in a healthier way makes it even better. Whether you’re feeding picky eaters, meal prepping for the week, or just craving something crispy and delicious, this recipe has you covered.
I’d love to hear how your chicken tenders turn out! Drop a comment below and let me know what dipping sauce combination you tried, or share any creative ways you’ve served them. Happy cooking, my friends!
Air Fryer Chicken Tenders
American · Main Course
Crispy, golden air fryer chicken tenders with a perfectly seasoned coating. Healthier than deep-fried and ready in just 20 minutes!
Ingredients
- 1.5 pounds boneless, skinless chicken breasts, cut into strips
- 1/2 cup all-purpose flour
- 2 large eggs
- 1 tablespoon water
- 1 cup panko breadcrumbs
- 1/2 cup regular breadcrumbs
- 1 teaspoon garlic powder
- 1 teaspoon onion powder
- 1 teaspoon smoked paprika
- 1 teaspoon salt
- 1/2 teaspoon black pepper
- 1/4 teaspoon cayenne pepper
- Cooking spray or oil mister
Instructions
- Array
- Array
- Array
- Array
- Array
- Array
- Array
- Array
- Array
- Array
Nutrition: 285 calories